This is Part 2 of a pair of articles on making a piece of music. Part 1 one covers the composition, this article looks at the mixing. Again I used Propellerhead Reason but the ideas will translate anywhere. I admit this is a very simple mix but it is the role of instruments and reasons for decisions that I want to share more than any particular tricks.

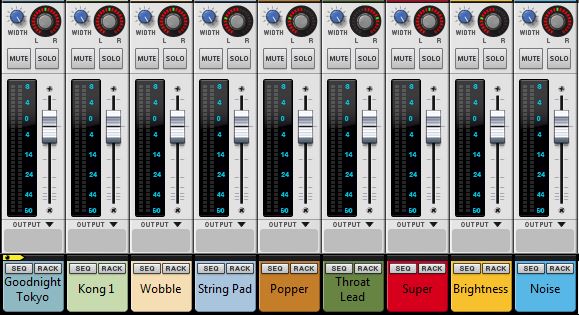
You may also notice that I have posted an image of the composition timeline and not the mixer. There is reason for this: while you would see lots of knobs and feel mixery you would learn nothing other than that I don’t use a mixer much. The heresy! Usually a final mix for me has all the faders at 0db, right where they started. I will commonly do most of my volume adjustment at the Gains at the top of the channel and at the instrument level. I save the faders for in case I need them later – rarely do. This is unusual and a result of mixing using MIDI in a single multi-timbral instrument with only one or two outs.
Like most DAW users I mix as I go so this final mix is really to get things polished and right. I have one Reverb on a Send Bus to create a common space for the piece and my usual Mastering Chain which I already explained so I won’t cover here.
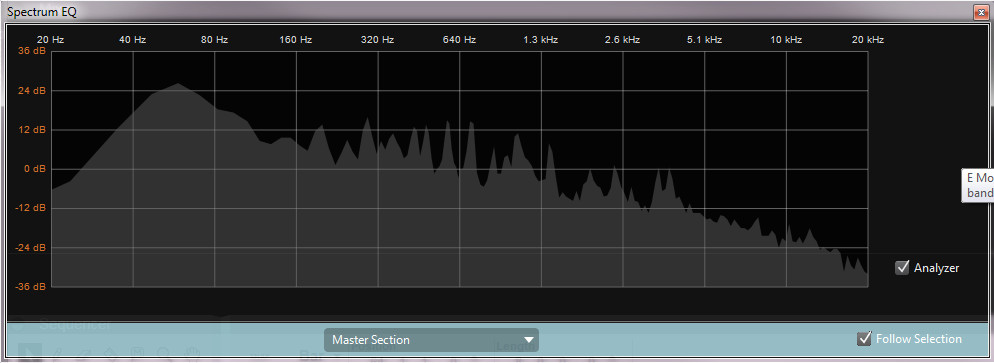
I now get to use a bit of EQ and that in itself is interesting enough.
Drums
Drums are the heart of the mix but remember that they are not the soul – that is the melody. Drums, like a heart, help keep the whole thing moving but are never the reason. The trick is to mix drums so they create punch but never so they crush everything else (even if they seem like they do). These drums need to be pretty present and near the top of the mix as the loop has a dance vibe. Sure I am going to round a lot of the Trance off that loop but I don’t want to start with a mismatch. I could have broken every drum out to a separate channel before I did anything but remember I only do that if there is a problem. Because I had compressed the Kik and Snare right at the start I didn’t feel the need to do any more – lest they got hammered – so the drums are all from the main Kong Outs. I was lucky and balance of all the sounds felt natural enough out of the gate – probably as the Kik & Snare had those Compressors right from the start so were already set to the right volume as I made them right there alongside the loop. The only thing I really turned down were the Toms as Tom rolls are not very sexy in EDM. That said I was keeping them as they do play a role as punctuation. I added some of the natty Tape Echo to the Cowbell but otherwise left drums dry for that immediate feel.
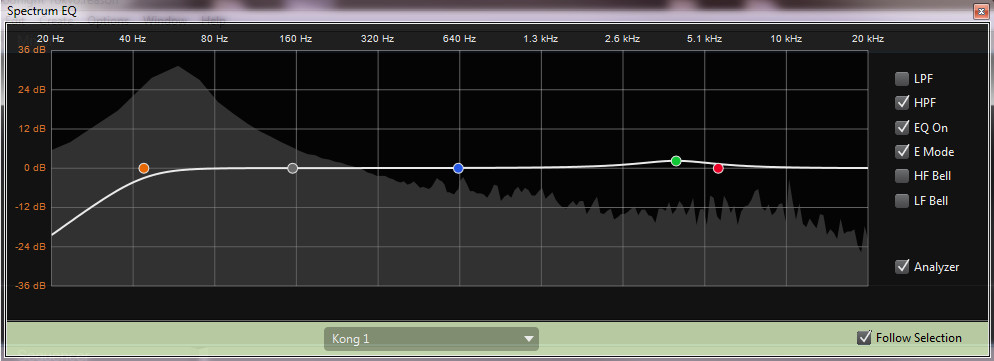
EQ: I rolled off useless rumble at 44Hz which also clears space for low bass to expand – note that I will boost the Bass in that very spot – take with one hand and give with the other. Otherwise I added +2db at 4kHz for air in the drums.
The Loop
Loops are both interesting & frustrating to work with as being audio they are set in stone. However with some processing a loop can be changed a lot. In this case I also kept things simple. I didn’t want to re-compress that loop as it sounded good already. I left it completely dry.
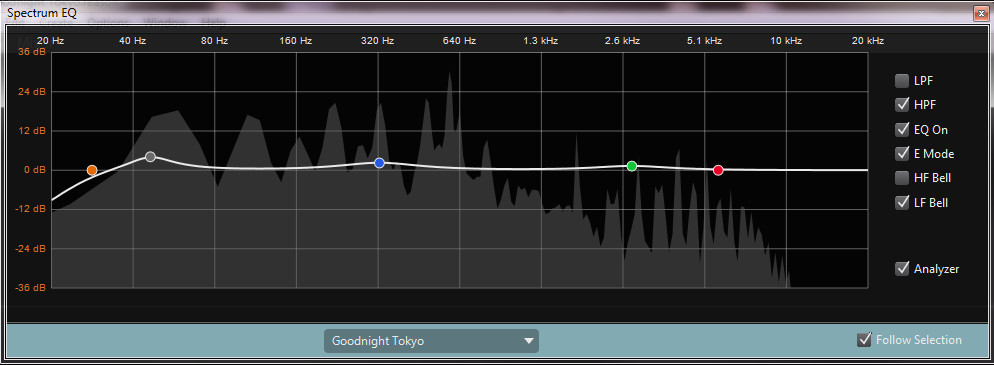
EQ: Useless rumble is rolled off at 28Hz. It wasn’t till the final mix that I added any processing and that was a +4db bump to the bass at 46Hz to keep it up in the mix as I had probably made things far more busy, and in a different way, than the originator had in mind. I played with a few boosts in the mids for bite but they just sounded messy and nasty – messing with the melodic instruments instead of staying as a foundation. What I did settle with was a 1db of boost to 2.7kHz for a tiny bit of brightness and 4db at 320Hz to reinforce the foundation.
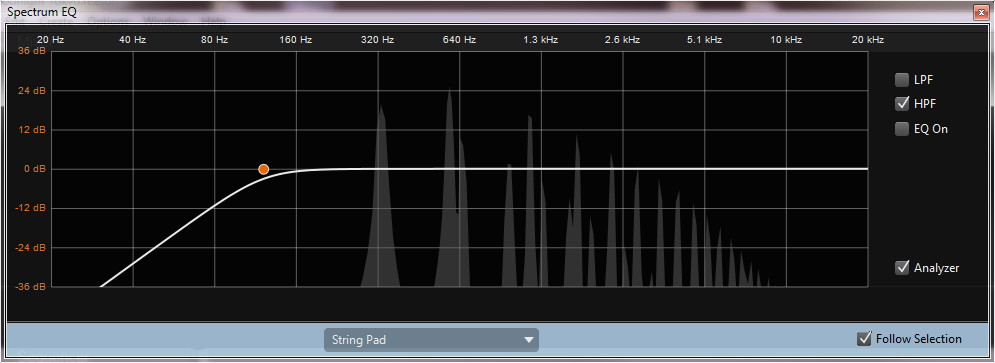
String Pad
The Juno 106-style pad already had a Chorus at the sound so all I added was -12db of the Bus Reverb. At times the sound didn’t sit so well in the mix but I decided to solve at the instrument. In the first breakdown I dropped the notes one Octave and lowered the Filter to clear them out of the way of the Super Saw.
EQ: The only EQ I did (outside of the synth Filter) was to roll off below 120Hz. Pads are there to fill a mix and provide a melodic/harmonic platform for the other parts to move around and interact with.
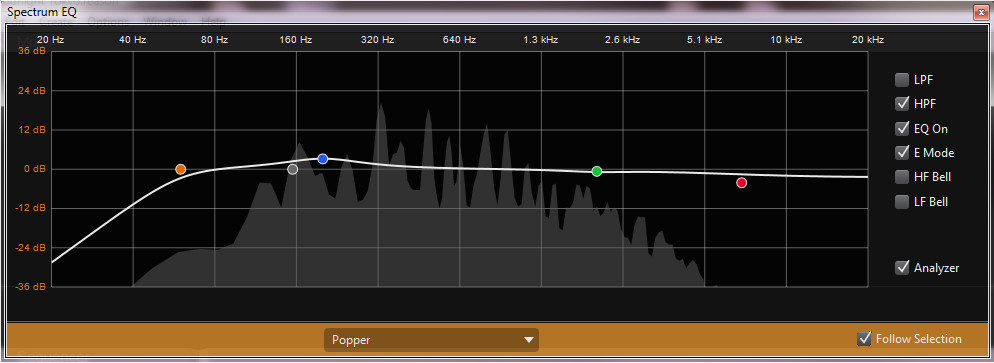
Popper
I explained the groove popper and the panned delay in Part 1. From a mix perspective the sound was made in the mix so there was little to do to make it play its role. I added -12db of Bus Reverb as I didn’t want the sound to sit above the main riff but to play off it. The reverb (and delay) push the sound back.
EQ: I didn’t need any low bass from this sound at all, it is really all about low mids, like a chugging electric guitar. I simply rolled off under 60Hz, dropped -4db at 7kHz & -0.5db at 2kHz as there was no need for poke in the mix. I reinforced the low mids by +3db at 200Hz for a more full sound and to get it matched with the riff/loop.
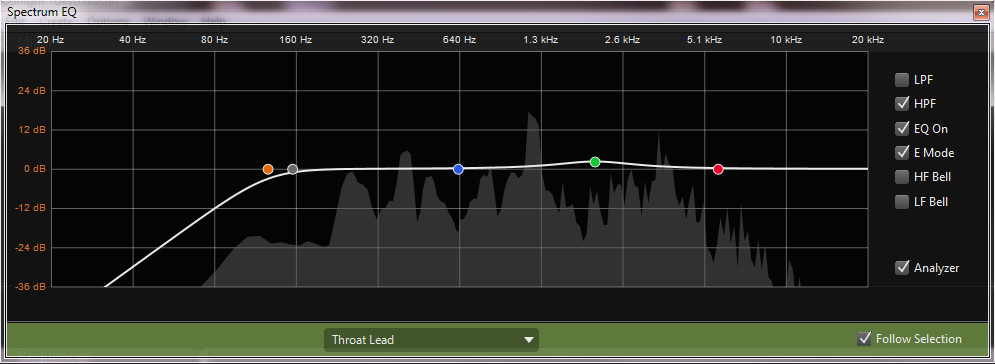
Throat Lead
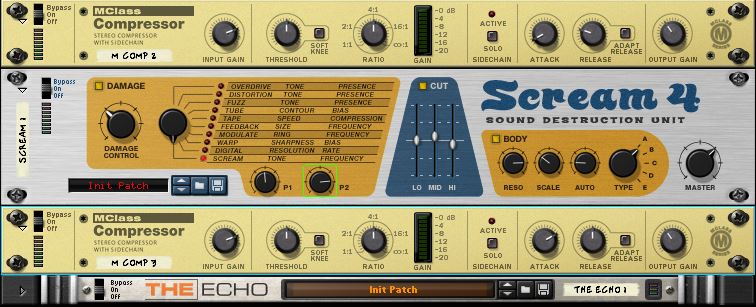
This sound probably got the most processing in the mix. I started with the Echo and -6db of Bus Reverb. This sort of lead is very much at odds with the more modern EDM vibe of the loop so I wanted it to seem like it was behind the mix – like the watcher in the situation. If the Loop, Super Saw and Pad are the city then this Lead represents the person as it moves more and is separated from the main city. I used Distortion as part of the sound (covered in Composition) but at the mix stage I added two layers of Compression:
1) Compressor #1 is designed to level off the sound pre-drive for a more even drive tone. It can make a sound a little less exciting but downside of exciting with distortion is sudden bits of unsightly splat that distract from the music (I’m lookin’ straight at you Pulveriser). 2) Compressor #2 puts some shape back in the sound and sets the overall volume after being assaulted by overdrives and compressors.
EQ: Useless Lows are rolled off from 125Hz. I boost a smidge at 2hHz as this sound still needs bite even though reverb means to put it behind the mix.
Super Saw
The Super Saw had its own Chorus and Delay at the sound. I tend to find the more you process a unison sound the worse it gets so I left it alone. -12db of Bus Reverb along with that delay helps it to sound big. Because too much of the Super Saw was just too much I used the Filter in the composition and this created not only variety and interest but cleared some space.
EQ: Rumble is rolled off from below the lowest fundamental played at 70Hz. I boosted +1.5db at 7kH for brightness and +2db at 340Hz for body.

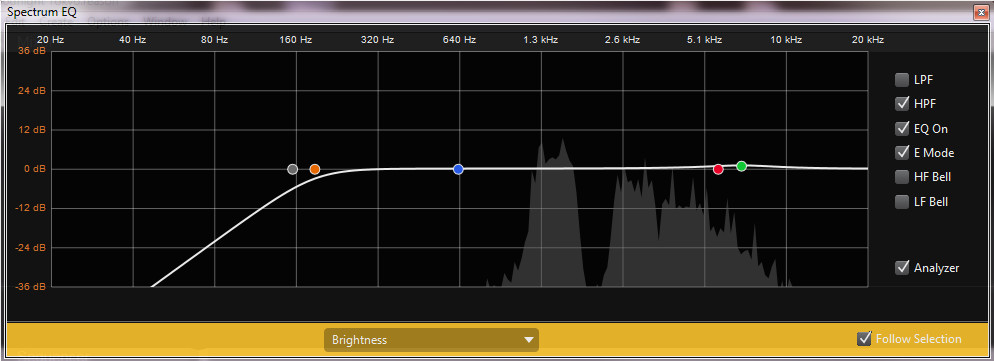
Brightness
As an incidental sound I was more than happy for Chorus and Delay to be handled on-board Thor along with a full 0db (unity gain) of Bus Reverb to get the sound nice and behind the mix.
EQ: As this sound doesn’t play in the lows at all I rolled off under 185Hz. Even bright sounds can create rumble so always best to remove it for the sake of clarity. As expected, I boost +1db at 7kHz for air but note I didn’t get aggressive here at all. The sound is to play in the highs but not be brittle which more boost and a lower freq would do.
Noise
I must admit I completely forgot to add any effect or processing whatsoever to the noise. Normally I would be sure to remove lows and maybe even highs so the effect doesn’t dominate the mix. Reverb & Delays would be used to taste and to move the sound backwards. But in many ways it is best I forgot as clearly it didn’t need anything. The lack of Reverb keeps the sound simple and immediate.
Panning & Stereo
A sense of stereo helps make a mix more engaging. This piece was simple enough I left most things alone.
- Loop: has stereo embedded, I am assuming from Chorus. I left alone to be true to the loop. In hindsight I would probably narrow that stereo about 50% once the other instruments come in to give a greater sense of space overall. Remember, too much stereo from every instrument creates mush.
- Drums: I kept in Mono for that old drum machine feel: simple, clean and in your face. The “wobble” sound gets some movement from its delay; subtle enough to be interesting but not intrusive.
- String Pad: gets stereo from the chorus and reverb but I pan 50% Left to create room for the Super Saw and Lead. The interesting thing is that being over on the side creates a sense of movement and width. Because the instrument has stereo from the chorus, and reverb spreads, the sound seems part of the mix and doesn’t create aural tennis. Also the brain accepts that band members don’t all stand in the one spot (unless they are The Cure).
- Popper: as explained Popper sound is panned 50% Left so the Delay appears 50% Right. That bounces around the original riff for a nice wide and lively sound.
- Lead: is panned 50% Right to give it space and separation from the main mix and balance with the Pad as the two play together for the finale. If I wasn’t already getting value from the Pad being on the right elsewhere I could have automated the pan as needed. The lead gets some stereo from the Delay and the Reverb which draws the sound back into the mix.
- Super Saw: is all-stereo from chorus (remember that extreme setting), delay and reverb. That lets it dominate the mix as it is the widest thing in town. Having the Pad panned left makes space on the right so the saw fills that automatically.
- Brightness: gets stereo from chorus, delay & reverb. As it plays mostly at the same time and frequencies as the Lead I keep it 50% Left so they don’t stamp on each other.

Hello Benedict, thanks for the great, detailed piece of work. I firstly read whole the story and played the song after. I was trying to imagine how it is going to be like, and I kinda got the idea, but the resulting song dominated my imagination anyway. I am glad that there are at least couple people like you, who put the effort to teach other people synthesis and mix in Reason. Not just through youtube tuts with zero explanation and story. Thats what I really like about your work. It is entertaining to read and therefore quite easy to remember and implement. Reason is best tool to teach signal and routing on, and thats what it is all about isnt it…sounds make the feelings. Melody is important but I think, at this point people have almost already ran out of the combinations of 16 halftones within the octave, What do you think?
Thanks. I too find many Tut annoying as they say press this button (after 15 mins of waffling) but rarely explain the reasons why I should choose that button over another. Music making is not about buttons but decisions.
As for not enough notes to make new melodies. I have to agree logically yet disagree in my heart. There are plenty of options for using those 12 tones (not sure where you get 16) to tell stories.